ClickSuper Document Export
The process of creating, uploading and processing your superannuation contributions is controlled via a single screen. The process involves the following steps;
- Create a ClickSuper batch
- Upload a batch to the ClickSuper web service
- Check the status of a batch and
- Accept or Reject a batch for payment
- From the Navigator, select Payroll | Payrun | ClickSuper Document Export
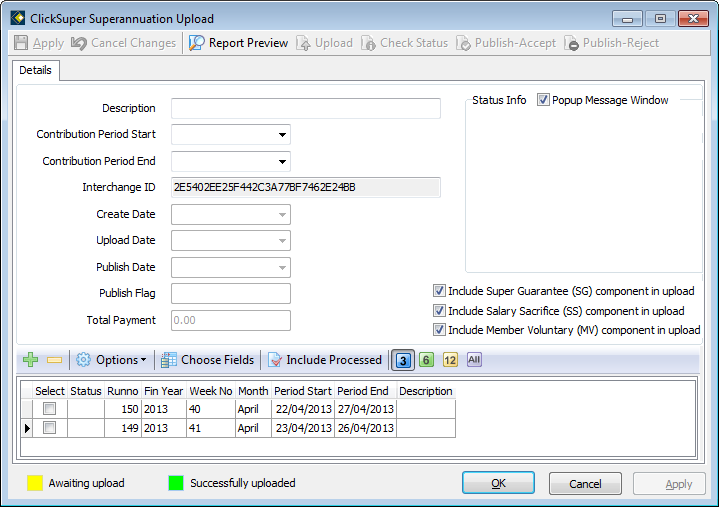
- Click Add New to display the ClickSuper Superannuation Upload screen:
Display options
This screen will automatically display payruns for the past three months and/or payruns where the super payments have not yet been processed. Note that you may need to click the 6 or 12 buttons to display payruns for that number of months, or the All button to show all payruns. You may also click the Include Processed button if you want to include payruns that have previously been included in a ClickSuper batch, during the time frame specified.

'Include' options
The three 'Include' options are selected by default:

These options allow you to choose which types of Super contributions you wish to include in the ClickSuper batch. For example, some companies pay their salary sacrifice contributions monthly, while paying the Super Guarantee contributions quarterly.
- Enter a Description. This might be something like ‘Quarter 1 2013’ or possibly the payrun numbers or date range included in the batch.
- Enter the Contribution Period Start and End dates. This is the period for which you are making member contributions. Normally for monthly contributions this will be the start and end date of the month, or for quarterly contributions it will be the start and end date of the quarter.
- Tick the checkbox in the Select column, for the payruns that you wish to include in this ClickSuper batch and then click Apply.
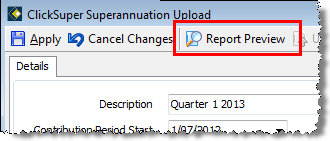
- Click the Report Preview button to view the Reconciliation Report containing the payruns you have selected.
Check the figure in Grand Total (For Upload). For example:
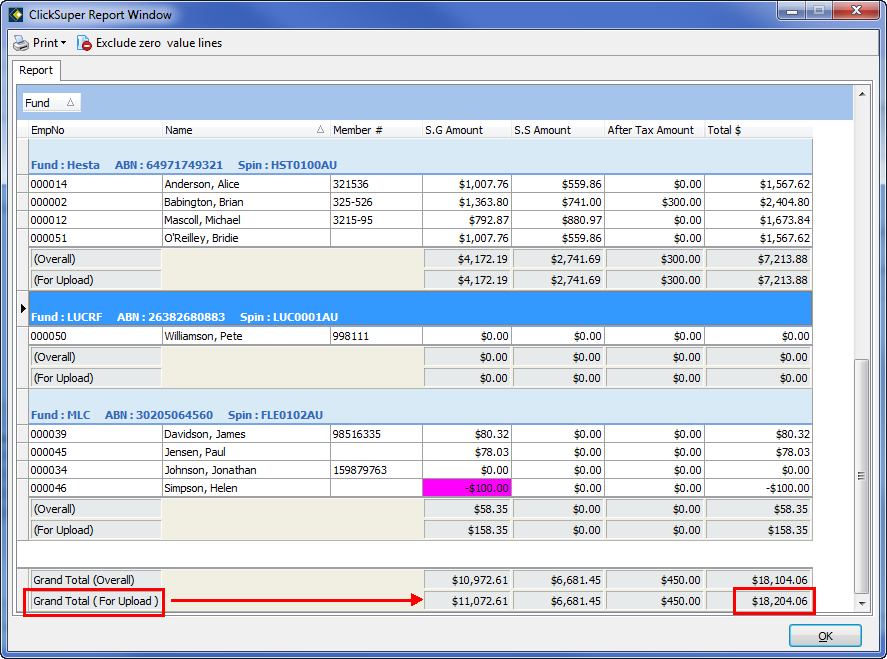
- Click the Print button to retain a copy of the Reconciliation Report for your records and then click OK to close the Report Preview screen.
Note that the Grand Total (Overall) and the Grand Total (For Upload) may differ as there may be occurrences of Super refunds, and these generate negative figures in the report. As ClickSuper does not accept negative values, this will be reflected in the Upload figure. (This type of figure is highlighted in pink on the Reconciliation Report, as in the previous example.) For this reason we suggest you check the Reconciliation figures against the Superannuation (Historical) report (via Report Explorer).
- If you wish to upload the batch straight away, proceed to step 3 of the following section ‘Upload a Batch to the ClickSuper web service’.
- If you intend to upload the batch at a later time, click OK and the current batch will be saved and the screen will close. The batch will display in the list of current and previous batches, for example:

Once you have created a ClickSuper batch, you are then ready to upload the batch to the ClickSuper web service.
- If not already open, you should open the main ClickSuper screen from the Navigator by selecting Payroll | Payrun | ClickSuper Document Export
- From the list of ClickSuper batches, select the batch you wish to upload and either;
- click the
 button
 - double-click the batch entry in the grid
or
- click the
The details of the selected batch will be displayed
- Click the
 button and the system will commence the upload process.
 - If successfully uploaded the Status Info notification area will display code 1014 – Your document uploaded successfully. If there was a problem it will display an error code – see step 1 of the next stage, Check the status of a batch, for further information on errors.
- A successful upload will also confirm the Total Payment figure, and change the Status of the selected payruns to green.
For example:
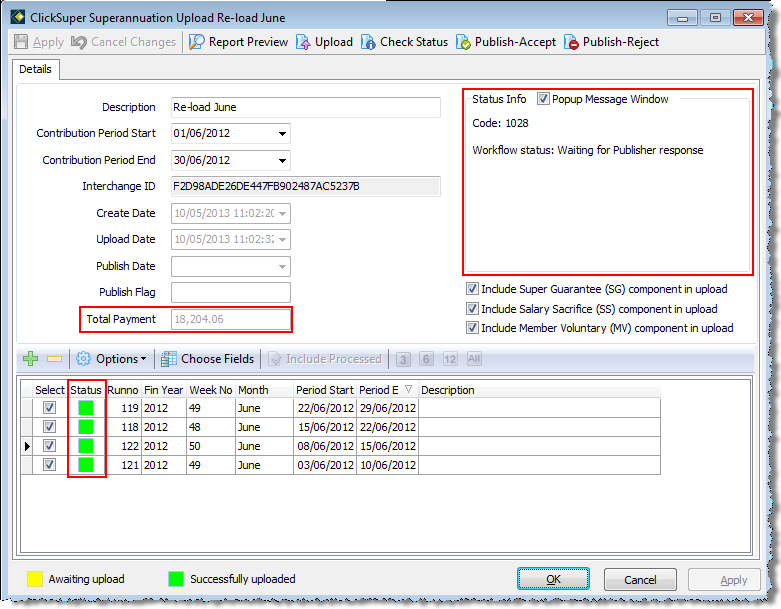
If you need to include a payrun from a batch that has previously been uploaded to ClickSuper, you will need to click the  button. Payruns that have been previously uploaded to ClickSuper will show a green status. Payruns that are awaiting upload in either this batch or another batch have a yellow status.
If you need to re-create a batch that was previously rejected, click Include Processed – this will allow you to reselect the payruns and upload them in the new batch.
When a batch is uploaded to the ClickSuper web service, it is submitted to a workflow queue. This workflow queue generally takes less than a minute to complete. You can check on the status of your batch at any time after you have clicked the  button by clicking the
  button. If the workflow is still in progress the Status Info notification area will display a message to that effect.
Successful Batch Upload
If your batch upload was successful, the Status Info notification area will display code 1031 – Workflow status: Successful. Click Check Status to display a report showing the total amount to be contributed to each fund. For example:
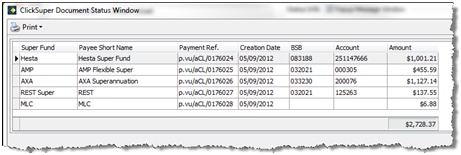
This report can be printed by clicking the  button.
View ‘Accept or Reject a batch for payment’ for the next step.
Unsuccessful Batch
If your batch was unsuccessful, the Check Status function will return some details about the exception that occurred. You will need to correct the error and create a new batch for upload as this batch cannot be processed any further.
The following example shows that an invalid ABN was detected for the upload:

Assuming that your batch was successful, you can either;
- Click the
 button to accept the batch for payment to the funds
The Status Info notification area will display code 1028 – Workflow status: Updated - Click the
 button to reject the batch and prevent any further processing.
The Status Info notification area will display code 1024 – Workflow status: Rejected by Publisher.
Note: once rejected a batch cannot be re-submitted for processing, a new batch would need to be created.
Note that by clicking Check Status, when you close the Upload batch window to return to ClickSuper Superannuation Upload, the Publish column will display Accept or Reject, as appropriate.
Self Managed Super Funds (SMSFs)
The Electronic Service Address (ESA) is included to cater for SMSFs via Superstream. Also, the email address of the Preferred Contact (for SMSFs only) is included in the ClickSuper upload batch. This is used to issue a notification that a payment has been made.
